
Support
Assembly Instructions
|
6 & 12 Rose Vases What you’ll need: Scissors Step One – Fill your vase to 1/3 full with your pebbles or glass. Carefully place your filler into your vase to avoid scratching the glass. Tipping the vase to the side helps to avoid scratching.
|
|
|
Step Two – Remove the elastic band from your roses and set aside.
|
|
|
Step Three – Start by holding your greenery, then place a rose with your greenery to start your arrangement. Roses can be bent to suit your arrangement.
|
|
|
Step Four – Place another rose with the greenery and repeat this step for all your roses.
|
|
|
Step Five – When you’re happy with your arrangement, secure with the elastic band at the bottom of the stems.
|
|
|
Step Six – Place your arrangement in your vase.
|
|
|
Step Seven – Fill your vase with your remaining pebbles or glass, whilst keeping your arrangement in the centre of your vase.
|
|
|
Step Eight – Take your time to style your arrangement to just how you prefer. Remember the roses can be easily bent to have them in exactly the right position.
|
|


|
Succulents What you’ll need: Skewer & Scissors Give yourself plenty of time to assemble your styling item. It can take between 30 minutes and 1 hour (depending on how familiar you are with this type of activity) to assemble. Step One – Pierce the soil packet in six places at the bottom. These are holes for excess water to drain.
|
|
|
Step Two - Place the unopened soil packet in the centre of your vase.
|
|
|
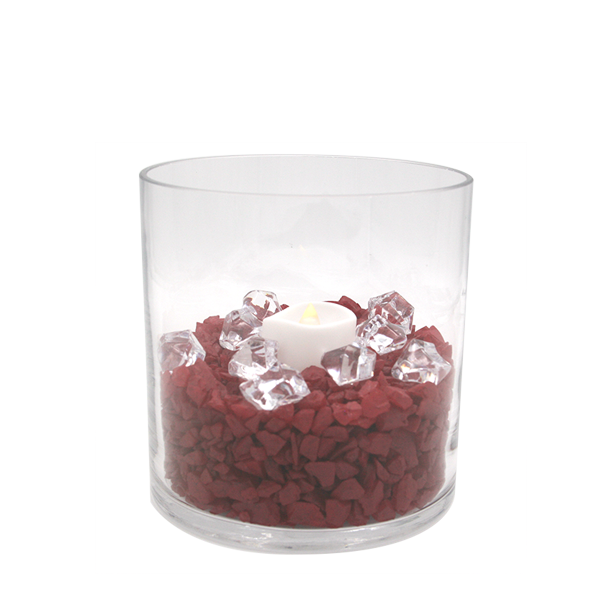
Step Three – Fill your vase to 1cm high with your pebbles or glass.
|
|
|
Step Four – Hold the beginning few cm’s of your fairy lights against the bottom of the inner edge of your vase.
|
|
|
Step Five – Place a little of your filler behind the fairy lights and in between the soil packet.
|
|
|
Step Six – Rotate the vase a little and hold the next few cm’s of your fairy lights against the inner edge of your vase and place filler behind it. You may find it useful to use the blunt end of the skewer or a pen to hold the fairy lights in place against the glass whilst you place your filler.
|
|
|
Step Seven – Repeat Step 6 until most your filler is used (leave enough filler to cover the top of the soil) and have a few cm’s of fairy lights left.
|
|
|
Step Eight – Hang the remaining fairy lights and its battery pack on the edge of the vase to keep it out of the way for the moment.
|
|
|
Step Nine – Cut open the soil packet just above the level of the filler and remove 1/3 of the soil from the packet and set aside.
|
|
|
Step Ten – Bury the fairy lights battery pack in the filler away from the soil. The battery pack must not get wet when watering your succulent(s) so keep this in mind when placing your battery pack. |
|
|
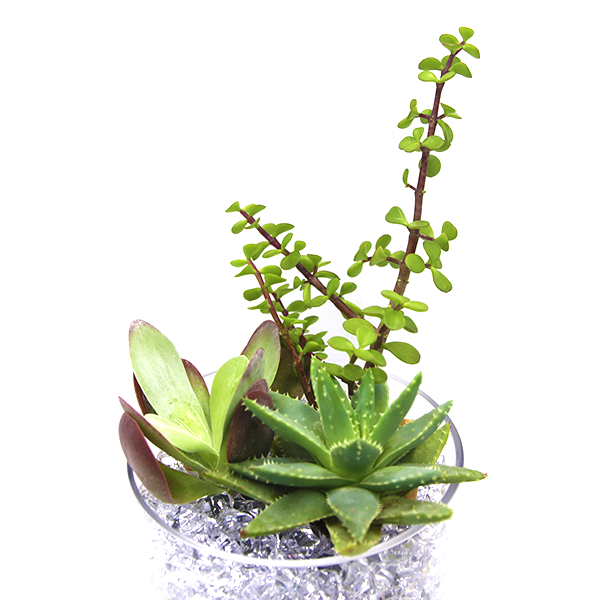
Step Eleven – Plant your succulent(s) in the remaining soil. Then spoon the soil you set aside around your succulent(s) to ensure the roots are covered. Next, flatten the edge of the soil packet so it's level with the filler. Place remaining filler around your succulent(s) on top of the soil.
|
|
|
Step Twelve - Succulents need light much more than they need water, so keep your succulent(s) somewhere where there is a lot of natural light. Give your succulent(s) a small amount of water. If it drains through to the bottom of the vase you’ve given it too much. That’s no problem, only water again when the soil is completely dry. |
|


Batteries - Single Succulent Vases
Replacement batteries are sold at most supermarkets. For this battery pack you'll need a screwdriver to open and it needs two 2032 batteries.
Batteries - 2 & 3 Succulent Vases
Replacement batteries are sold at most supermarkets. This battery pack is easily opened without the need for a screwdriver and needs three A76 batteries.
Succulent Care
We’ve selected succulents for your styling items because they are so easy to care for. They just need light, water and a well-drained soil.
Light - Succulents just need a position where they get lots of natural light.
If you're keeping your succulents outside that's great.
If your keeping them inside, that's OK but they need to be near a window to catch the natural light.
They can be placed elsewhere inside your home but you'll need to give them a sunshine holiday every few weeks.
Water – Succulents store their water in their leaves, so they don’t need much water at all. Only water if the soil is completely dry and then with just a small amount. It’s better to not water them at all than to water them too much. Depending on where you live, watering only twice a year should be enough. As a guide to start, use the following watering amounts:
1/2 Cup of Water for our Single Succulent Vases
3/4 Cup of Water for our 2 Succulent Vase
1 Cup of Water for our 3 Succulent Vase
We use a small ironing water cup for watering as it makes it easier to control the water flow and ensure it's getting to the right place.
Tip: Pour slowly so the water doesn't overflow.
Well-drained Soil – as all our succulents live in glassware it is easy for you to see if there is excess water collected in the base. If there is, it means that you’re over watering. Remember to pierce the soil packet a few times when assembling to let the excess water flow from the packet to the base of the vase. If you have excess water, leave watering your plant again until the water has dried up and the soil is completely dry.
FAQ
Q: What do I do if my succulents are not looking healthy?
A: We love to help you keep your plants healthy. Just take a photo of the whole plant and a close-up of the leaves, then email them to us at info@abfabstyling.com.au and we’ll get back to you with some care instructions.